Game addon
Reads the supported character details needed by Companion.
 scryTome
RoR Stream Bridge
scryTome
RoR Stream Bridge
For Return of Reckoning streamers
scryTome RoR Stream Bridge connects a lightweight game addon, a Windows Companion, and a Twitch Extension. You choose the character and the categories your viewers can see.
Download
The installer brings the Companion, and the Companion installs and updates the game addon for you. Download it, then work through the setup guide below.
Version 0.7.9 for Windows 64-bit. It installs under your own Windows account, so it does not need an administrator password.
scryTome-RoR-Stream-Bridge-0.7.9-setup.exe3096675540aed2e1f5b494c302dd9a0c3cb91806867ca3453d01eb0aec22c76bBefore you start
The Companion installs the matching addon, connects your Twitch channel, and lets you approve the character data that reaches viewers.
Reads the supported character details needed by Companion.
Shows what was found and lets you choose exactly what viewers can see.
Lets viewers explore approved details as a channel Panel or interactive Video Overlay.
Nothing reaches viewers until you approve that character in Companion and channel publishing is on.
Any Twitch account can add it to a channel, and step 5 walks through that. Viewers install nothing and sign into nothing: they open your channel and it is there.
Installation guide
Follow these steps in order. The setup box opens at whichever step still needs doing, so it may start at a later step than the guide shows. That is normal and not an error. Read the steps it settled for you, then carry on from the one it shows. Small wording differences are normal too. Check the help section only when a step will not complete or shows an error.
Close Return of Reckoning. Download the installer from this page and run it for your current Windows user. On the final page, leave the launch box ticked and choose Finish. Companion opens by itself and shows FIRST-TIME SETUP.

If the setup box opened past this step, your game folder was already confirmed and you can carry on at the step it shows.
Choose Find automatically. If nothing is found, choose Browse and select the main Return of Reckoning folder, the one that contains the game launcher. If Browse is unavailable, paste that folder's full path and choose Use this folder.
Do not select the Interface, AddOns, or RoRStreamBridge subfolder.
You should see: the box moves to 2 Install addon.

The addon installs only while the game is not running. That is already true if you have not opened it since step 1; if you did, close the game itself now. The Return of Reckoning launcher can stay open.
Choose Stop Game Link, then choose Install addon and wait for the confirmation.
You never download or update this addon yourself. When a new version is needed, Companion opens its setup box and asks you to close the game and choose Sync addon again. Your other addons are left alone.
You should see: the box moves to 3 Enable sharing.

Start Return of Reckoning and log into a character. The small RSB icon appears near the center of the screen the first time and can be dragged out of the way. Click it to open the RSB window.
Sharing is on from the start, so this is a quick check: Share from game and all seven category boxes should already be ticked. The Companion: and Approval: rows show what is still missing. Back in Companion, choose Sharing is on.
Prefer chat? /rsb status shows the current state, /rsb start turns sharing back on, and /rsb iconreset recenters a lost icon.

On 5 Finish, headed Ready for your first stream, choose Show Publishing Bar. That closes the setup box and leaves you on the Publishing Bar, the strip just above the Now, Characters, and Channel Policy buttons. It stays there from now on.
You should see: on that strip, Selected channel reads twitch.tv/ followed by the channel you just paired, and Channel publishing reads Enabled.

Open Channel Policy. All seven categories start as Share, so this is where you decide what belongs on stream. Each row has a switch at the right. Switch one off and that category stays private for every character.
A single character can be given its own exception later, on the Characters page: select the character, then choose Change on the category you want to differ.
You should see: seven category rows, each reading Share or Private where you switched one off.

You should see: the Now banner reads PUBLISHING TO VIEWERS, and Viewer status on the Publishing Bar changes to Visible within about a minute. If it stays Offline or Unknown for more than two minutes, screenshot the whole Companion window and tell us on the support page.

Open Twitch Creator Dashboard - Extensions, then My Extensions. Find scryTome RoR Stream Bridge, choose Activate, and pick Add as a new panel for the first check. The Panel works while your channel is offline.
Once the Panel works you can return to My Extensions and switch to Set as Overlay 1 for the interactive Video Overlay. One Twitch pairing covers both placements, so switching never needs another code, and the Overlay uses the placement you saved in Configure.
You should see: on My Extensions, the Extension moves from Installed to Activated in the slot you chose.

Open your own Twitch channel. Confirm your character appears with the categories you left shared, and that sections open and close. An Overlay appears only while the channel is live.
From there, one rule covers the rest. Untick a category in the game window, set it to Keep private on that character, or switch the category off in Channel Policy, and viewers stop seeing it. Pause all publishing hides everything at once, and Resume publishing brings it back without pairing again.
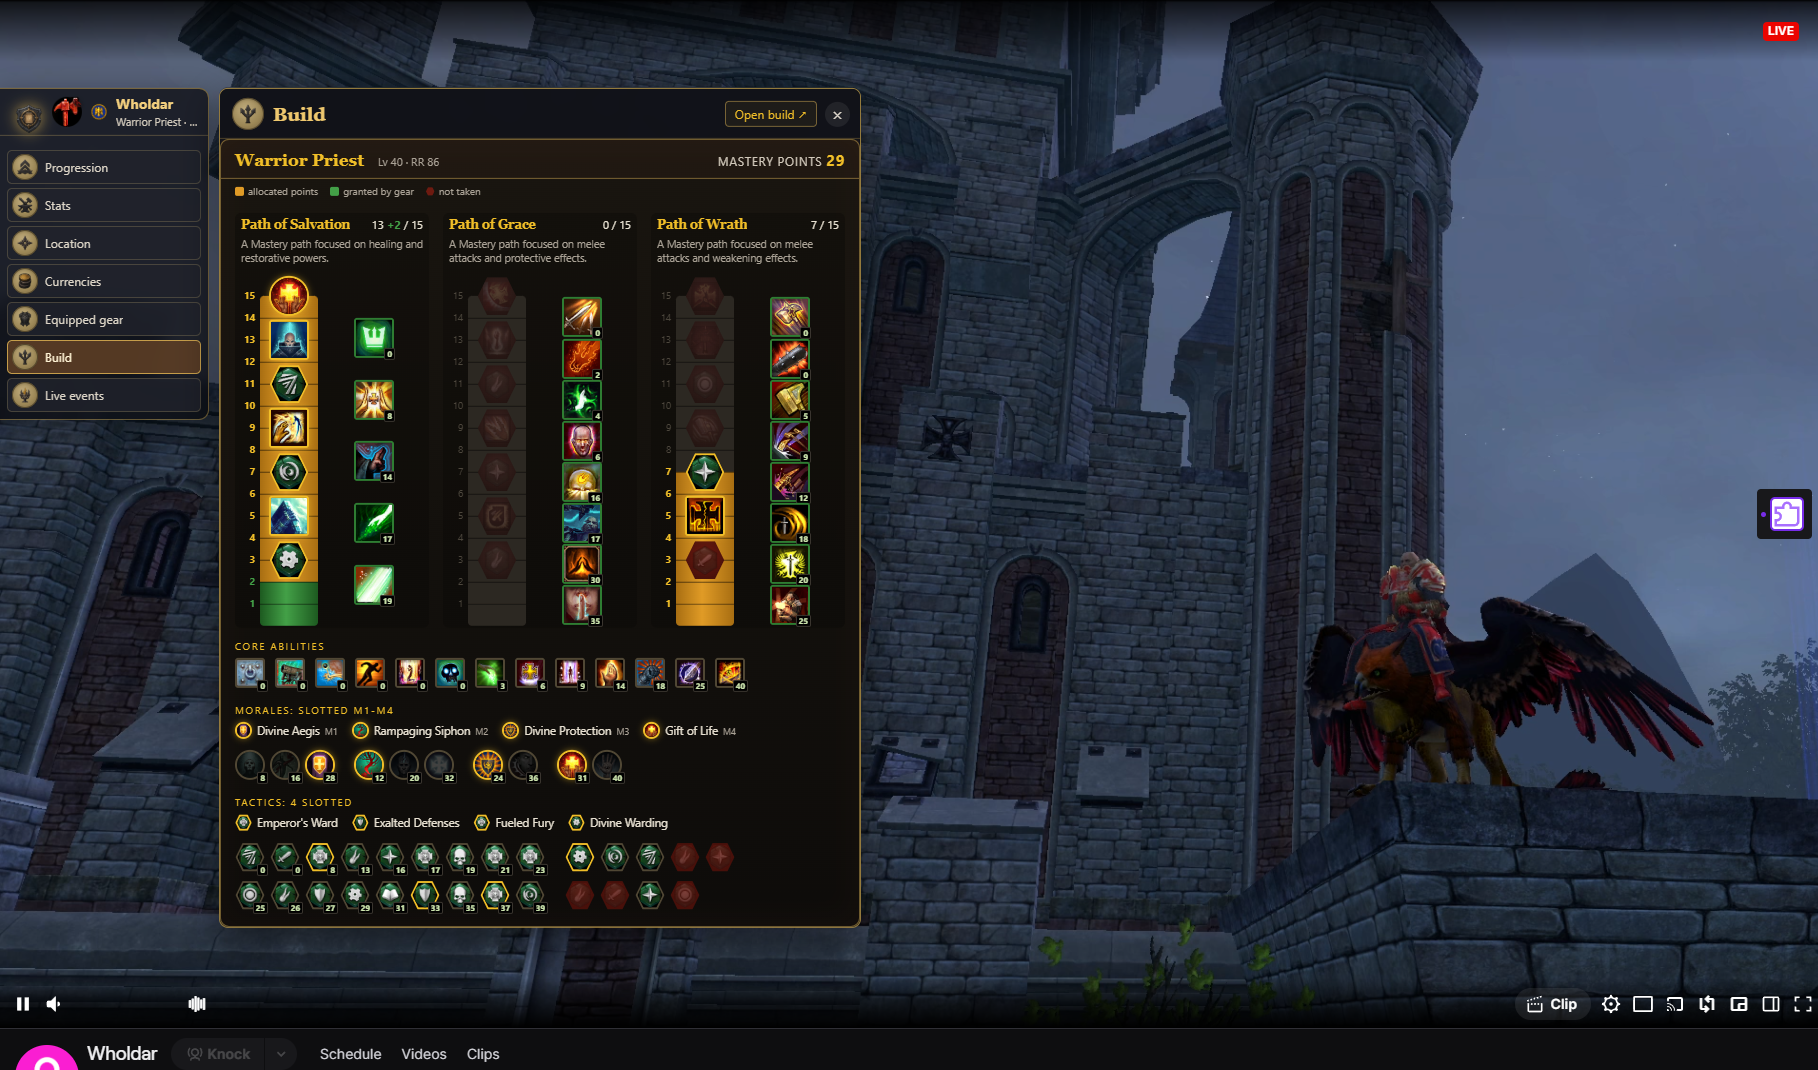
Panel or Overlay
Lives below the video and can be checked while the channel is offline. It is the simplest placement for a first test.
Opens over the live video. Streamers can configure edge, position, Distance into the video, and whether the character rail starts open.
Overlay placement settings are used only when the Extension is activated as a Video Overlay. They do not affect the Panel.
Help
Stop at the first failed step and report what you can see on the support page. Avoid changing hidden settings or repeating Twitch pairing unless support asks.
Recheck the folder you picked in step 2: the one that holds the game launcher, not a folder inside it. If that same folder is still refused, stop and report it with a picture of what the folder contains.
Confirm Twitch is signed into the account you stream from, then open the Extension link in step 5 again. If Twitch still refuses, take a screenshot of its message and see the support page.
A one-time code cannot be reused after Twitch accepts it or after it expires. Return to Companion, start pairing again, get a fresh code, reopen Configure, and use only the new code.
Return to Companion and wait for it to finish connecting. Do not paste the approved code again. If Companion says the code expired, is unavailable, or must be replaced, start again with a fresh code.
Viewers install nothing, so this is rarely on their side. Ask them to reload your channel page. If it is empty for everyone, including you while signed out, work through the NOT SHARING checks below.
Wait up to two minutes. If the status does not become Visible, take a screenshot of the whole Companion window and stop. Do not disconnect Twitch or pair again as the first troubleshooting step.
If the game was open during installation, log out and back in or type /reloadui. If the icon is still missing, the wrong game folder may be selected. Check the folder under Settings in Companion.
Confirm Twitch connected, channel publishing is Enabled, Game link is Watching while the game is open, the current character is approved, and at least one category is still shared in both the game window and Companion. See the support page for the complete checklist.
The support page has the Discord invite and a check for each symptom. Include your Windows version, the first step that failed, and a screenshot of the visible error.
Ready when you are
The setup runs once. After that, approving a character is the whole job.
Download the Companion